10 Foods You Can Re-Grow From Scraps
1. Garlic

Step1: Place budding cloves or a whole garlic bulb in a transparent bowl.
Step 2: Add water until it touches the bottom of the cloves. Do not submerge the cloves in water, else they will rot.
Step 3: Change the water every other day.
Step 4: If you want, you can plant the budding cloves in soil with organic fertilizers/compost. You can keep using the shoots and in a few months’ time, each garlic clove will become a bulb!
Trim the shoots and use them in salads, chutneys, stir-fries and egg dishes.
Tip – Do not trim more than one-third of the sprout at a time.
2. Ginger
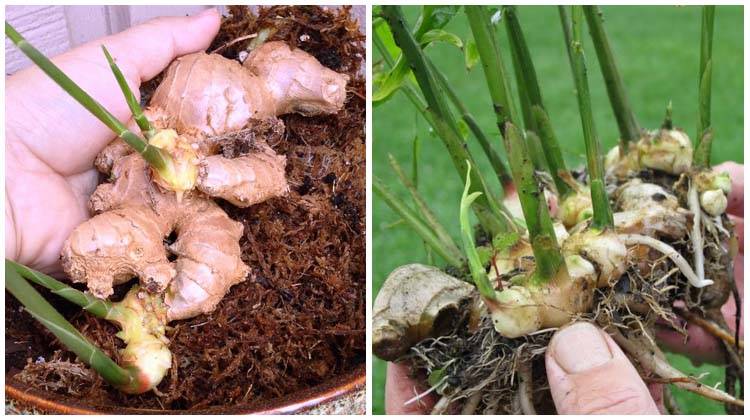
Step 1: Place a full piece of ginger horizontally in potting soil with the smallest buds facing down.
Step 2: Place the pot in indirect sunlight.
Step 3: Pull out the entire plant once it starts growing roots and shoots and re-plant it in your garden.
Tip – When you pull out the ginger plant from the pot, you can separate pieces with nodes, from where roots and shoots originate, to replant multiple plants.
3. Carrot Greens
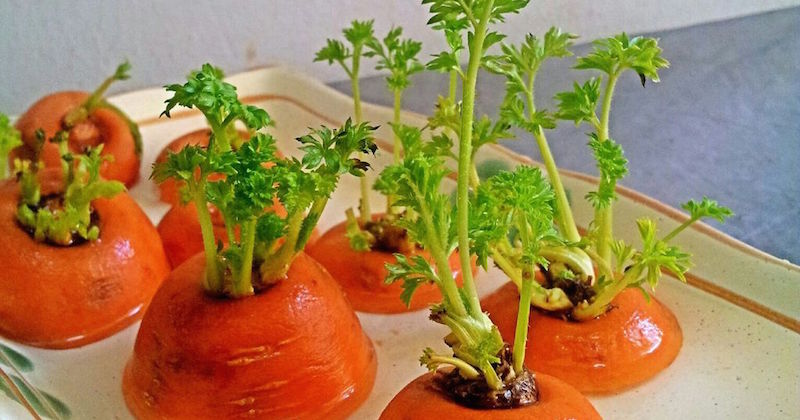
Step 1: Place carrot tops facing downwards in an inch of water (don’t submerge the tops).
Step 2: Place the dish in direct sunlight.
Step 3: Change the water every other day.
Step 4: Replant the tops in soil when the shoots sprout.
Step 5: Keep trimming the shoots and use them in salads, soups and as a garnish.
Tip – Do not cover the shoot with soil.
4. Lemongrass
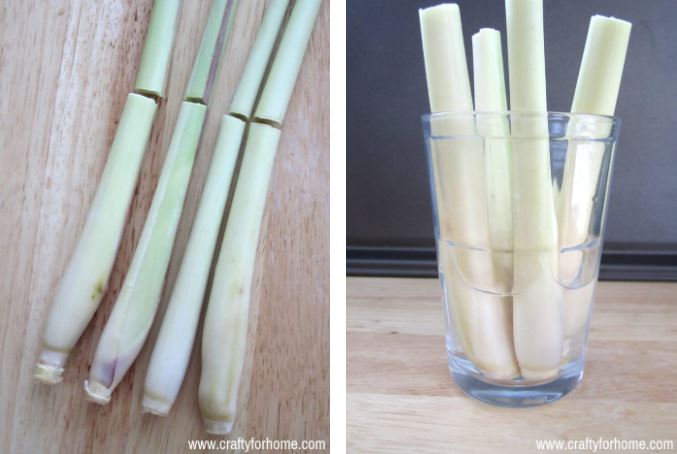
Step 1: Cut off the tops of a bunch of fresh lemongrasses for your use and keep the stalk ends.
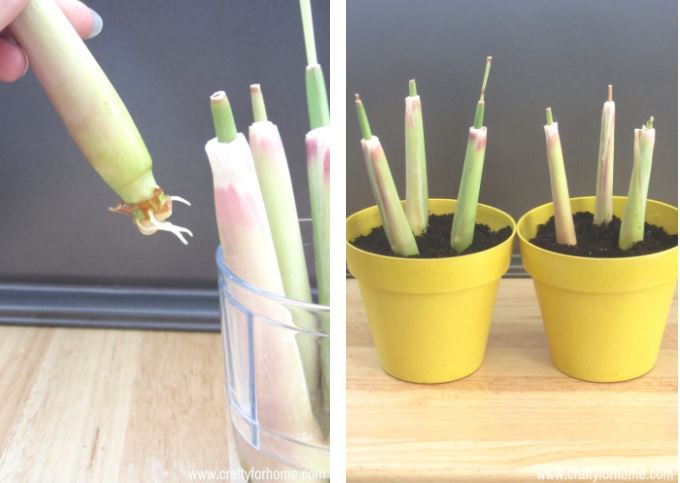
Step 2: Place the stalks in a jar or tall glass of water and place near a window with enough sunlight.
Step 3: When the roots start coming out of the stalks plant them in a pot or your garden and keep enjoying fresh lemongrass in your tea and stir-fries throughout the year
Tip – Lemongrass thrives in sunlight.
5. Onions
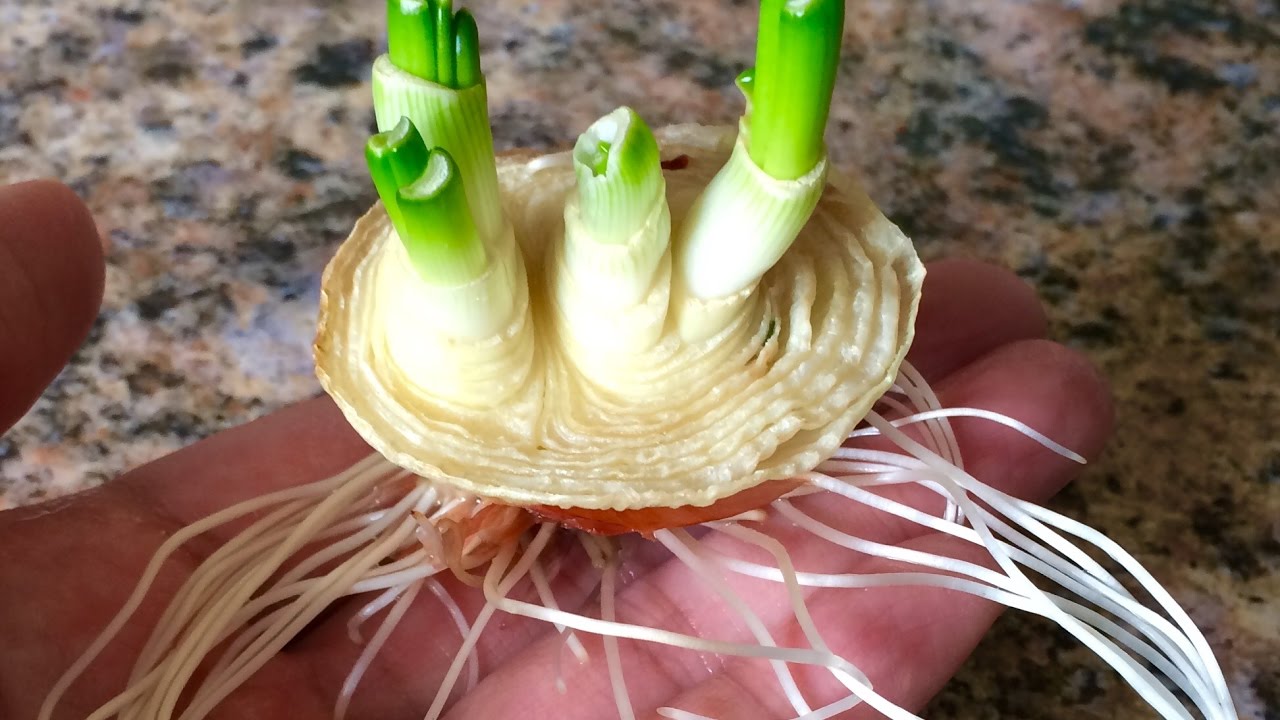
Step 1: Place the onion bottoms in a shallow dish with water with the roots down. Place near a window that gets enough sunlight.
Step 2: Soon you’ll see green shoots appear. Place in a pot for a few weeks. Trim the shoots and enjoy a supply of fresh onion greens.
Tip – If you have any budding onions in your pantry, plant them in the ground for a steady supply of onion greens.
6. Pineapple
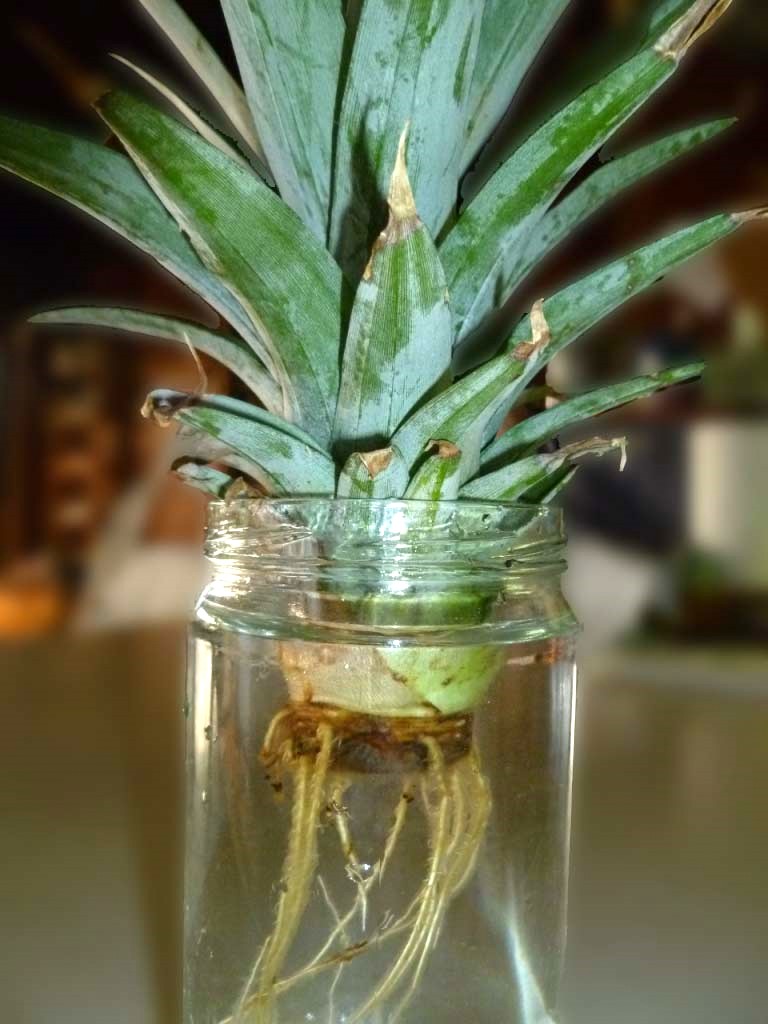
Step 1: Choose a pineapple with green fresh leaves.
Step 2: Remove the top of it by twisting it off.
Step 3: Peel back any leaves so that the bottom layers are exposed.
Step 4: Trim off the outer layers of the pineapple top at the bottom of the crown, or stem, until the root buds are visible.
Step 5: Poke three to four toothpicks into the pineapple base and suspend it over a glass container with water.
Step 6: Leave in a sunny area and change the water every other day.
Step 7: In a few weeks you will see roots. When the roots are fully formed, plant the top in a planter. Your pineapple tree should yield fruit in 2 or 3 years.
Tip – Keep the plant exposed to plenty of sunlight and water it regularly.
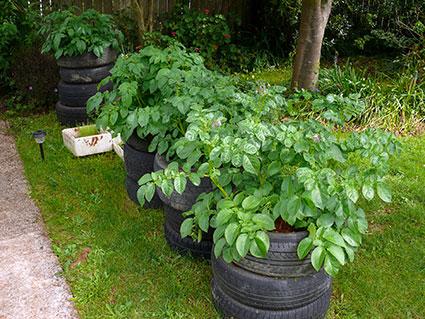
7. Potatoes
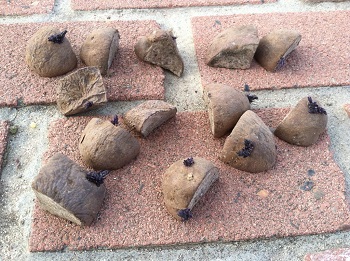
Step 1: Cut out pieces of potatoes that have developed at least 1 or 2 eyes or sprouts each.
Step 2: Let the pieces sit at room temperature for a few days until dry to touch.
Step 3: Plant them deep about one foot apart in at least 8 inches of soil.
Step 4: Mulch with compost and keep the plants well watered.
Step 5: Keep covering the stems with soil as they grow. One potato can yield up to 1 kg of home-grown potatoes!
Tip – Grow potatoes in tyres – keep adding layers of tyres and filling with soil as the stems grow. You can get a few kgs of potatoes from such plants!
8. Avocado
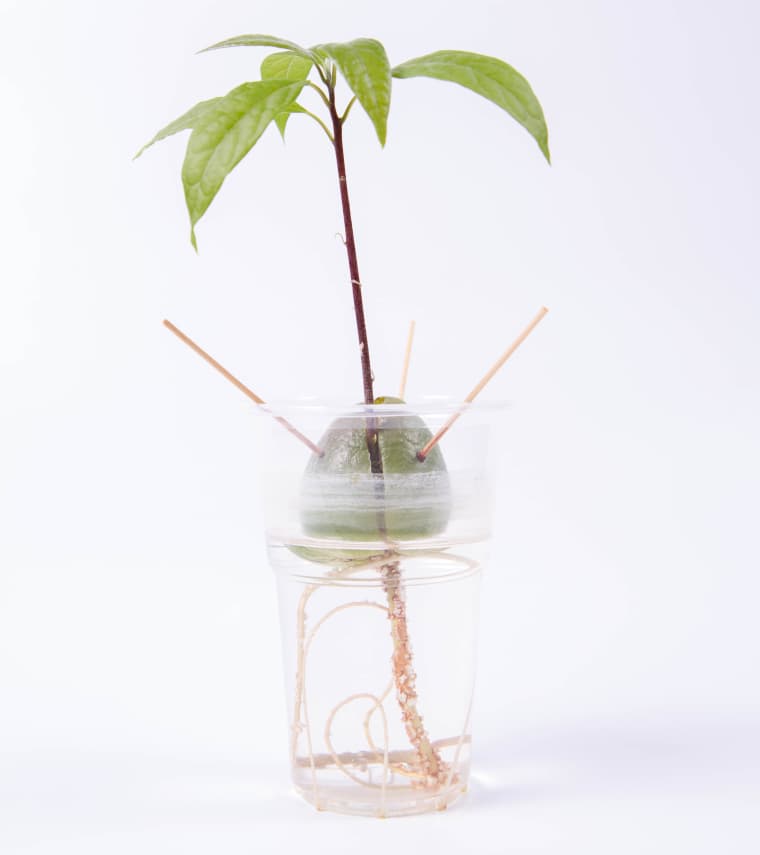
Step 1: Wash and wipe dry the avocado pit and leave it for a few days at room temperature.
Step 2: Poke 3 toothpicks into the pit at even distances.
Step 3: Place the setup over a glass jar with the pointy side of the pit facing upward.
Step 4: Fill the glass jar with water and submerge half the pit in the water.
Step 5: Place near a window with ample light and remember to change the water every second day.
Step 6: After a few weeks, the pit will start to crack and roots and a shoot will emerge.
Step 7: After almost three months when the plant is about 7-8 inches tall, plant it in a 10-inch pot. Leave the top of the pit uncovered. Make sure the plant gets enough water and sunlight.
Tip – Trim the top leaves for a bushier, healthier plant.
9. Romaine Lettuce
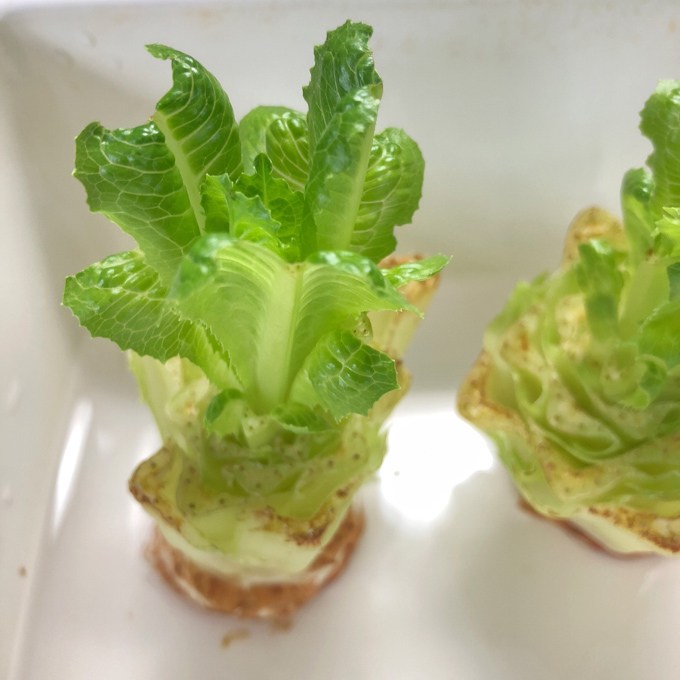
Step 1: Cut the leaves of your purchased lettuce at about 1 inch from the bottom and use. Place the stem in a shallow dish with about half an inch of water.
Step 2: Keep the bowl in a sunny area and change the water regularly.
Step 3: Once lettuce sprout, plant it in the garden.
Tip – If you want to continue growing lettuce, cut the romaine heads off right above the soil line with a sharp knife, leaving the base and root system intact.
10. Basil & Mint
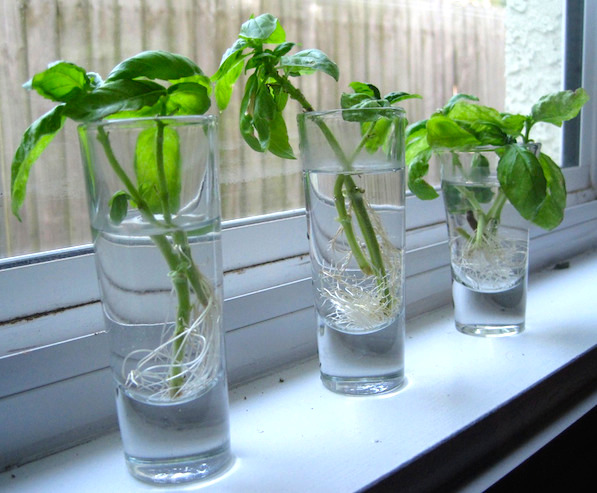
Step 1: Strip bottom leaves from ¾ of the basil or mint stems.
Step 2: Put the stems in a glass of water and place in a sunny area.
Step 3: Change the water every day.
Step 4: When the roots grow about 2 inches, plant the stems in a 4-inch pot. Get fresh herbs whenever you want.
Tip – Do not remove all the leaves at the time of harvest. Pinch the tops to get bushier plants.
Have you tried any of these ideas already? Or, are there any other fruits, vegetables and herbs that you might have successfully regrown from scrap? Do share your ideas and experiences with us in the comments section.